Chocolate Peanut Butter Truffles
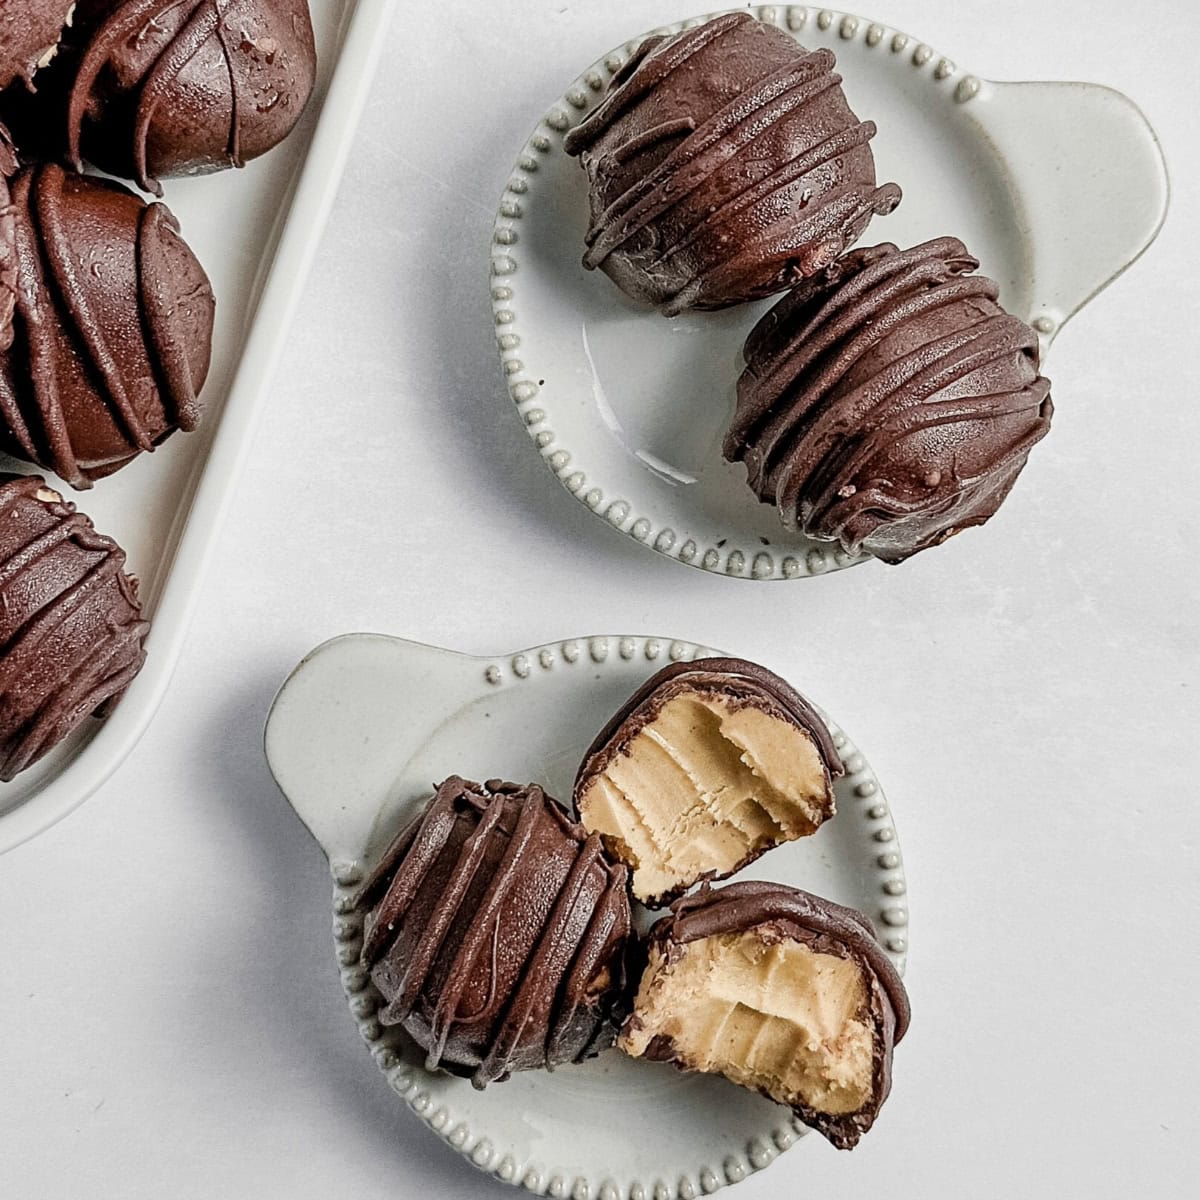
These Vegan Chocolate Peanut Butter Truffles are rich, creamy, and coated in a smooth chocolate shell, just like classic peanut butter balls but made entirely dairy-free. They’re no-bake, freezer-friendly, and perfect for holidays, parties, or whenever a chocolate peanut butter craving hits.

If you love indulging on peanut butter cups, or truffles (like this sugar cookie truffles or pumpkin pie truffles), you’re going to be obsessed with these easy Chocolate Peanut Butter Truffles.
They are a more indulgent version of my peanut butter energy balls and feel like a special occasion when you treat yourself to these.
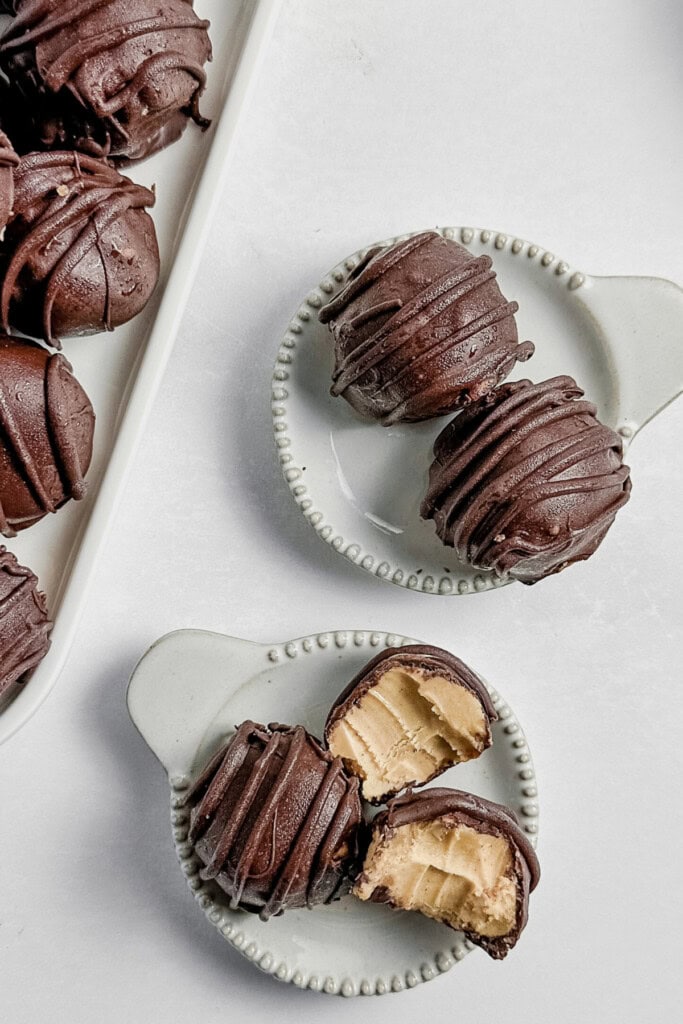
These truffles have a sweet peanut butter center covered in rich chocolate. This recipe comes together easy - you only need basic ingredients, one bowl, and they’re naturally dairy-free with vegan butter and chocolate chips.
Table of contents
- Why You Will Love These Chocolate Peanut Butter Truffles
- Key Ingredients for Chocolate Peanut Butter Truffles
- How To Make Chocolate Peanut Butter Truffles
- Best Tips to Get the Perfect Chocolate Peanut Butter Truffle
- Serving Ideas for Chocolate Peanut Butter Truffles
- Frequently Asked Questions
- Other Peanut Butter Desserts You May Enjoy
- Recipe Card
Why You Will Love These Chocolate Peanut Butter Truffles
Besides being absolutely delicious, here are some other reasons why you would love this recipe
- No-bake and easy: The peanut butter filling mixes up in 10 minutes and the rest is just chilling and dipping in chocolate.
- Classic flavor combo: Creamy peanut butter and semi-sweet chocolate give you that nostalgic peanut butter cup taste in truffle form.
- Dairy Free and Vegan friendly: Using dairy-free butter and chocolate chips keeps these truffles completely plant-based without sacrificing texture or flavor.
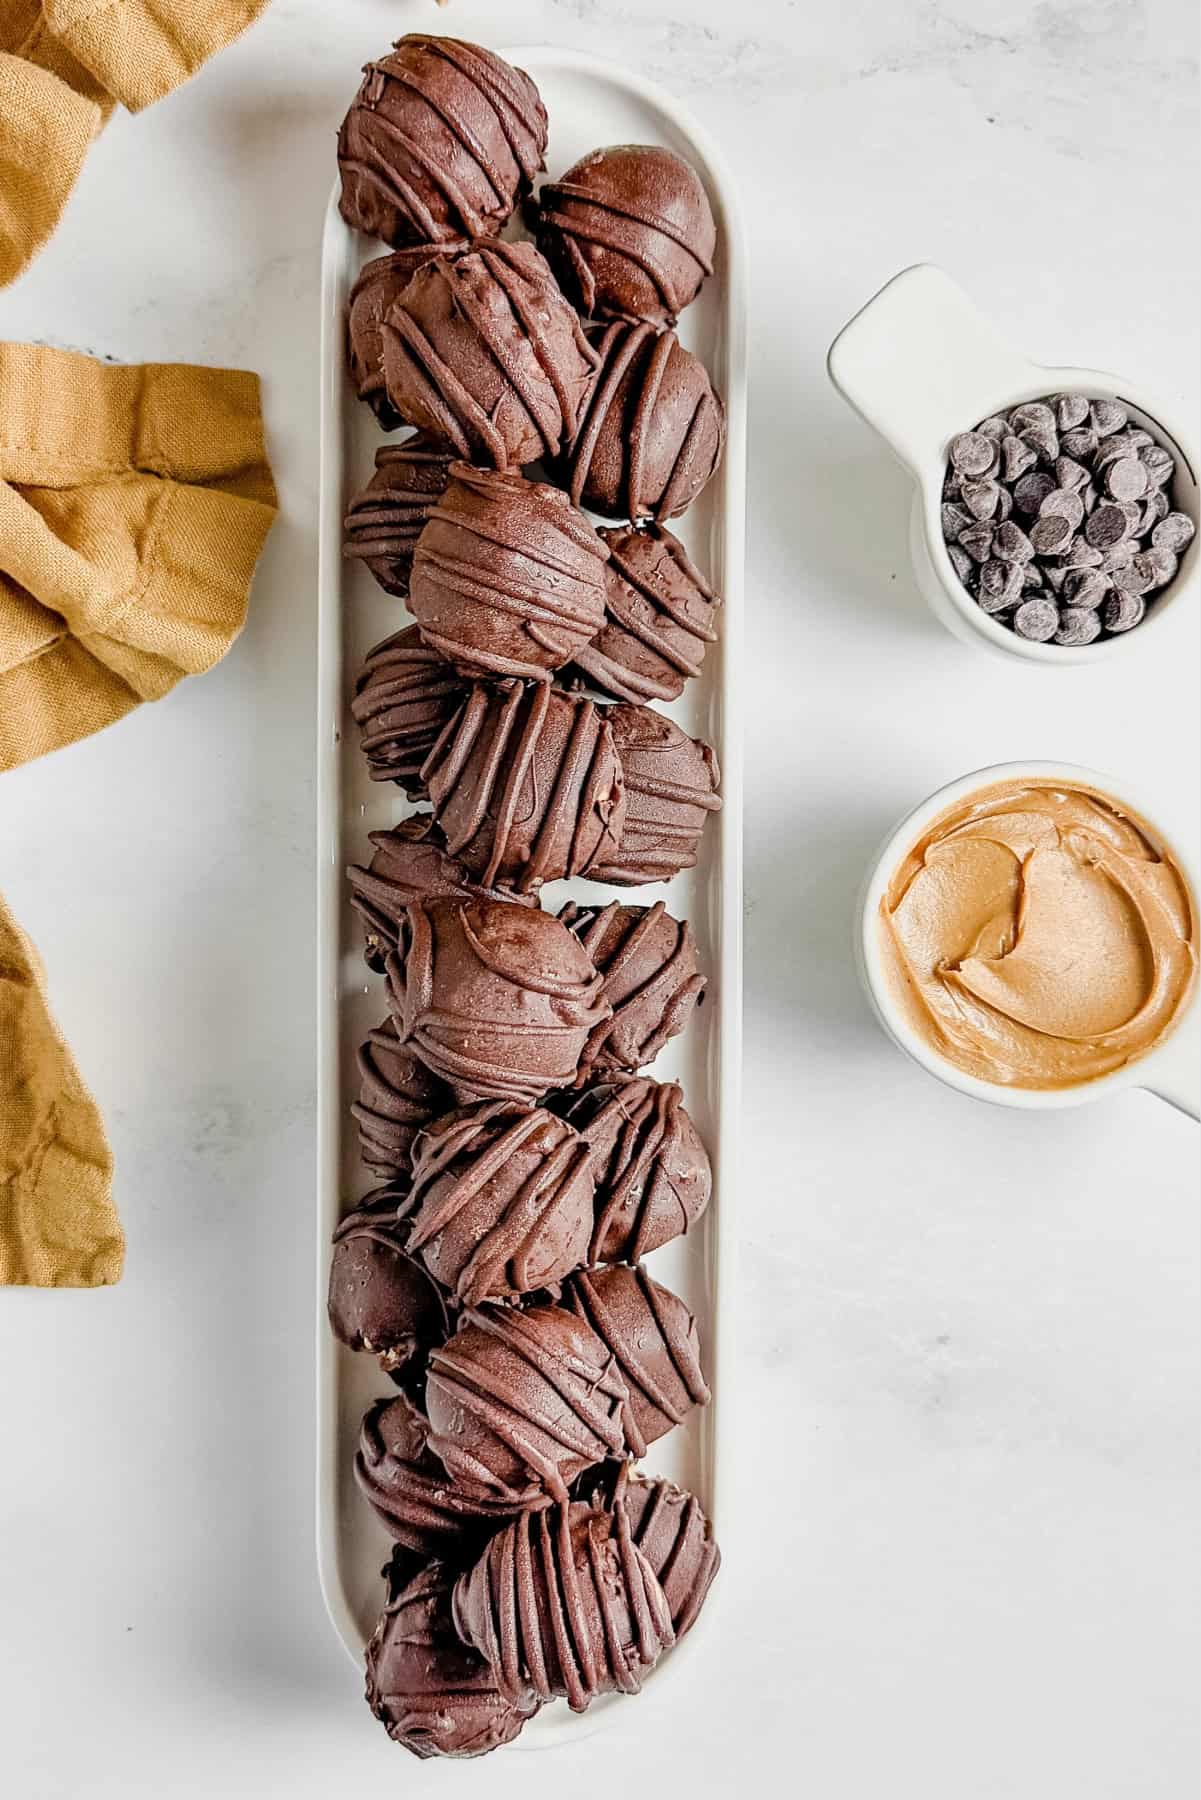
- Great for gifting: They look fancy on dessert platters and hold up well in the fridge, similar to other homemade candy-style truffles.
- Make-ahead friendly: The centers can be rolled and frozen ahead of time, and the finished truffles store well in the fridge for days.
Key Ingredients for Chocolate Peanut Butter Truffles
See recipe card for full set of ingredients:
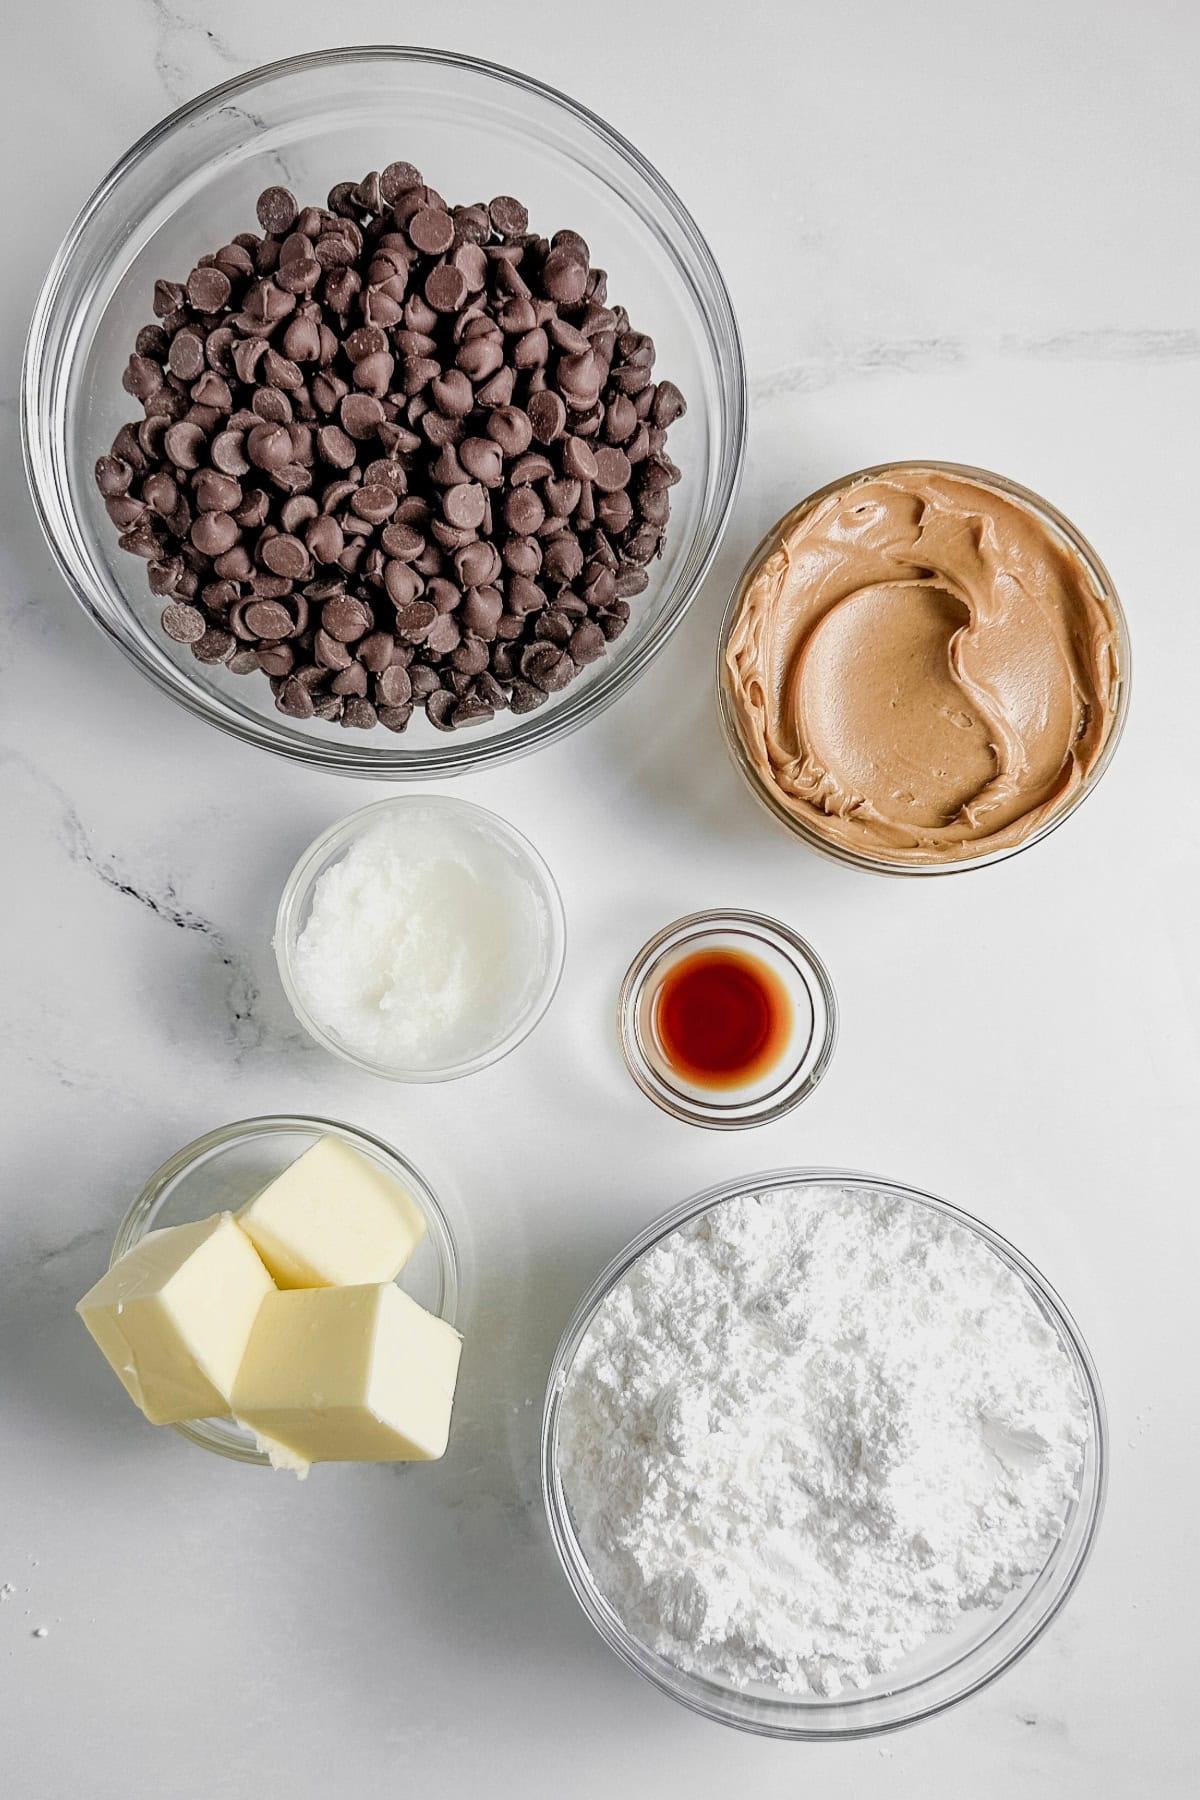
Creamy peanut butter (do not use natural peanut butter): A regular creamy peanut butter like Jifs gives the filling a smooth, thick texture that rolls easily into balls and holds its shape, unlike natural peanut butter that can separate and make the mixture greasy or too soft.
Vegan unsalted butter sticks: Softened vegan butter (like Earth Balance sticks) adds richness and a little structure so the filling is silky but firm once chilled, similar to classic butter- and sugar-based peanut butter truffle fillings.
Powdered sugar: Powdered sugar sweetens the filling and also thickens it, turning the peanut butter and butter into a moldable, non-sticky dough that doesn’t fall apart when dipping.
Vanilla extract: A small amount of vanilla boosts the overall flavor and brings out the nuttiness and chocolate notes!
Vegan semi-sweet chocolate chips and coconut oil to make the chocolate dip.
How To Make Chocolate Peanut Butter Truffles
These chocolate peanut butter truffles come together in three simple steps: make the filling, chill and roll, then dip in chocolate. (Full instructions and timings are in the recipe card below.)
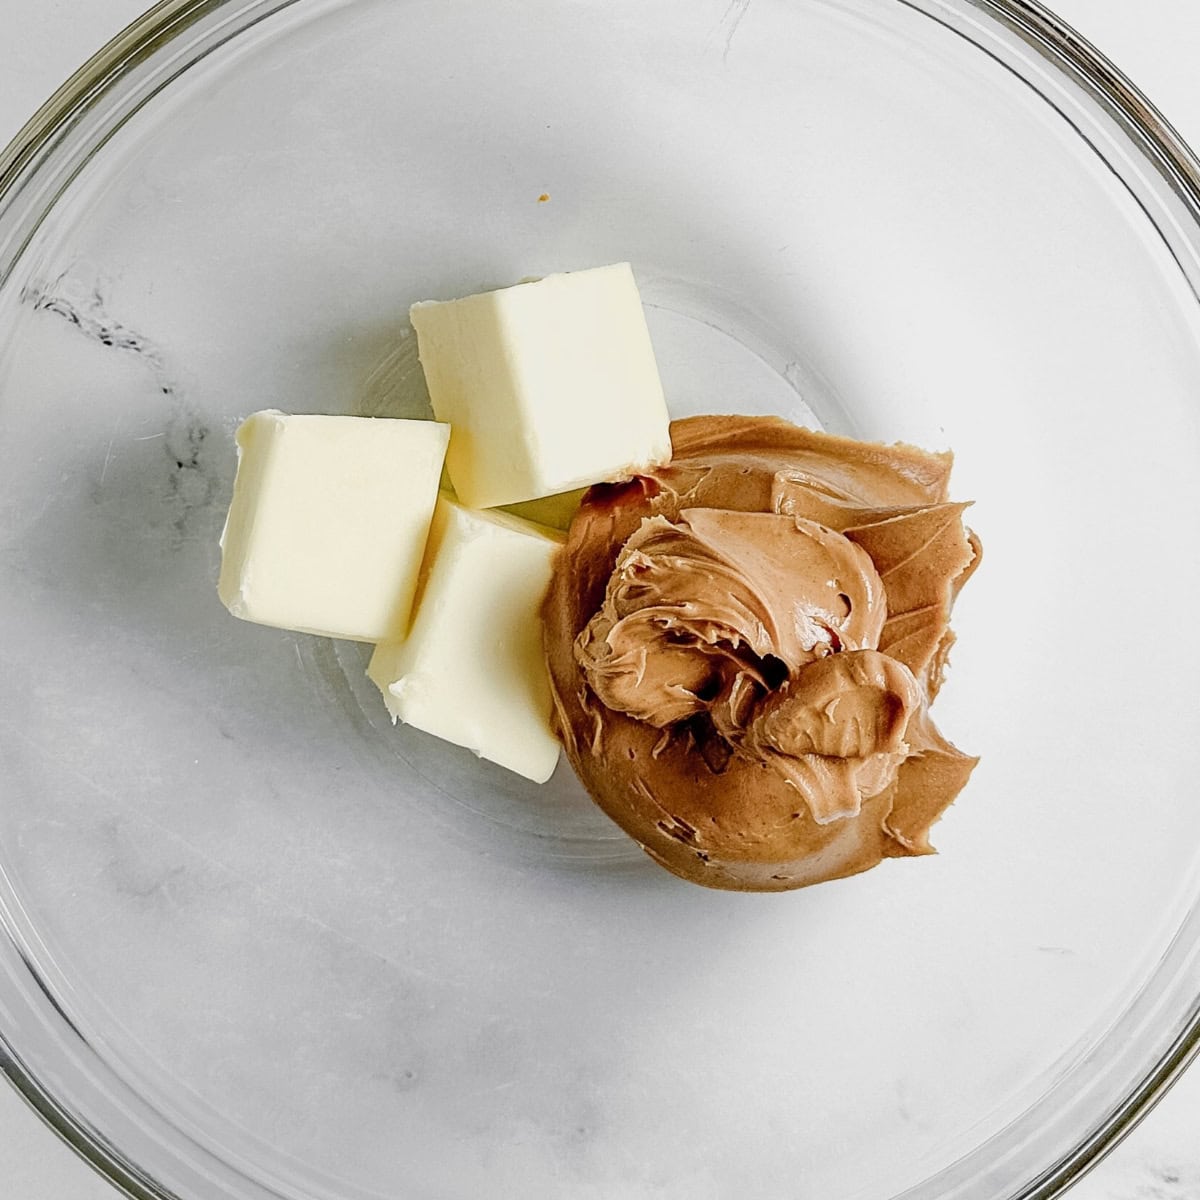
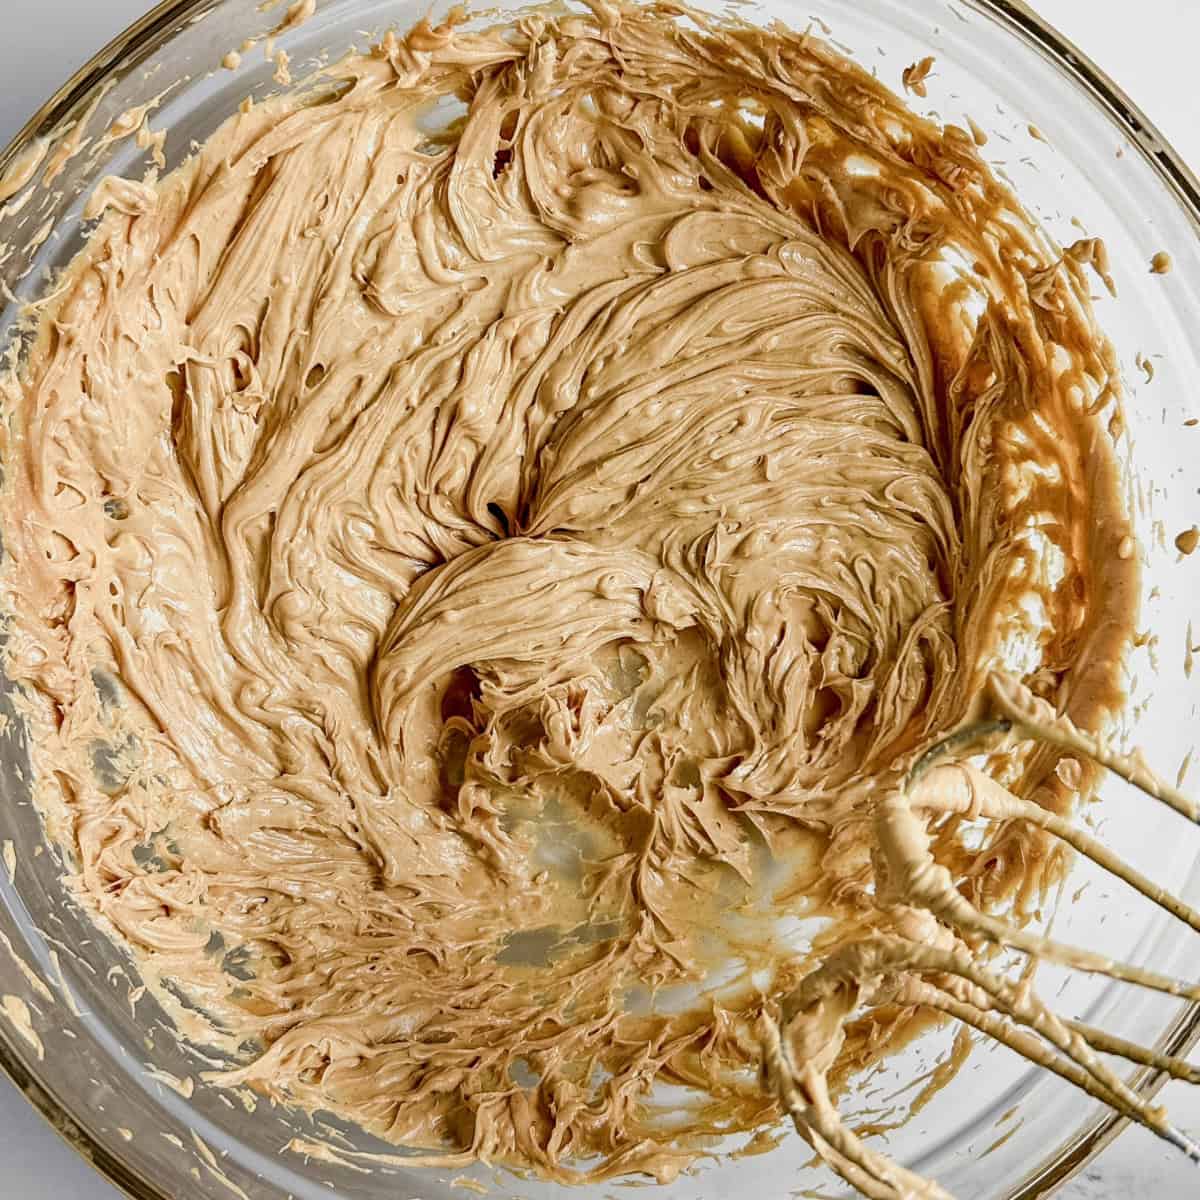
Make the Peanut Butter Filling: Add creamy peanut butter and softened vegan butter to a large bowl and mix until smooth. Stir in powdered sugar, vanilla, and a pinch of salt (if using) until a thick, rollable dough forms.
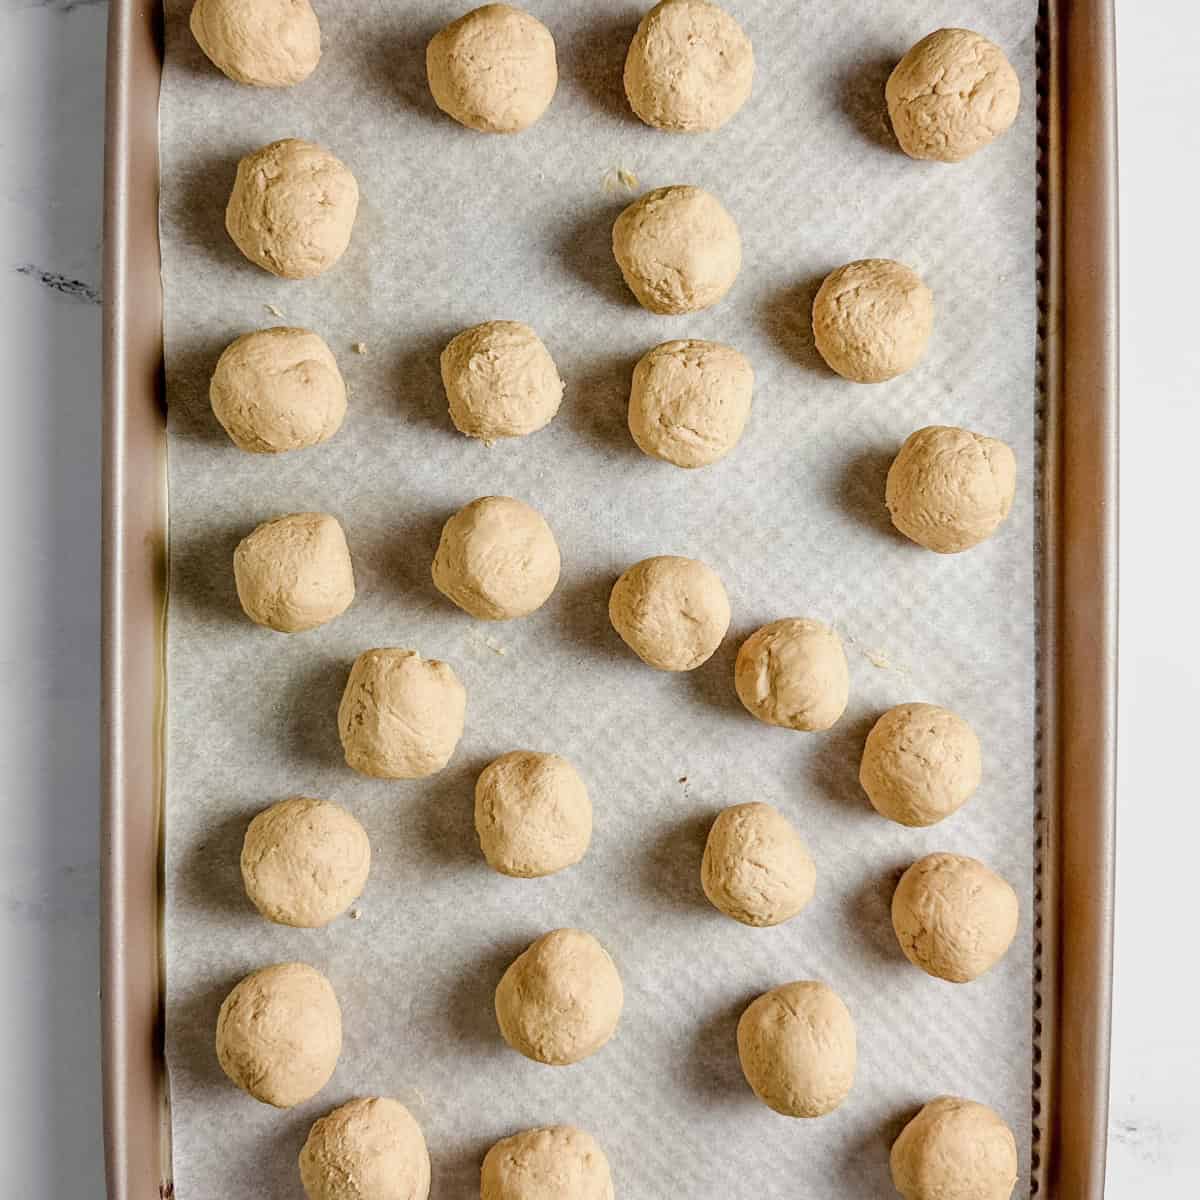
Shape and Chill the peanut butter truffle centers: Line a baking sheet with parchment. Roll into 1-inch balls, place on the tray, and refrigerate for about 30 minutes, until firm.
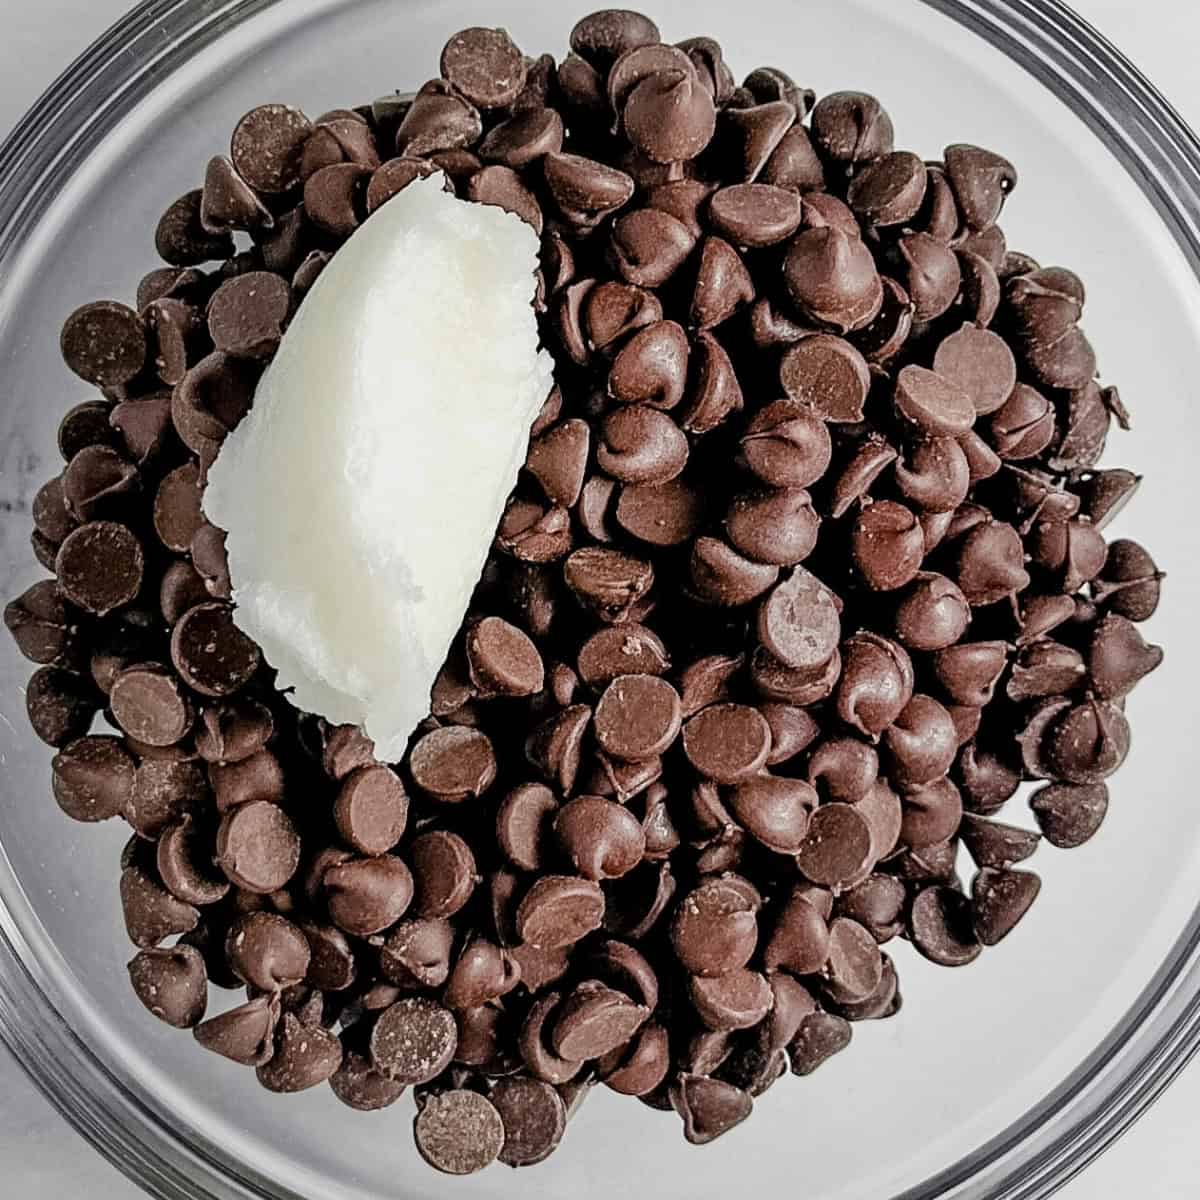
Make the chocolate coating: Combine vegan semi-sweet chocolate chips and coconut oil in a microwave-safe bowl. Microwave in short bursts, stirring between each, until melted and smooth; let cool slightly.
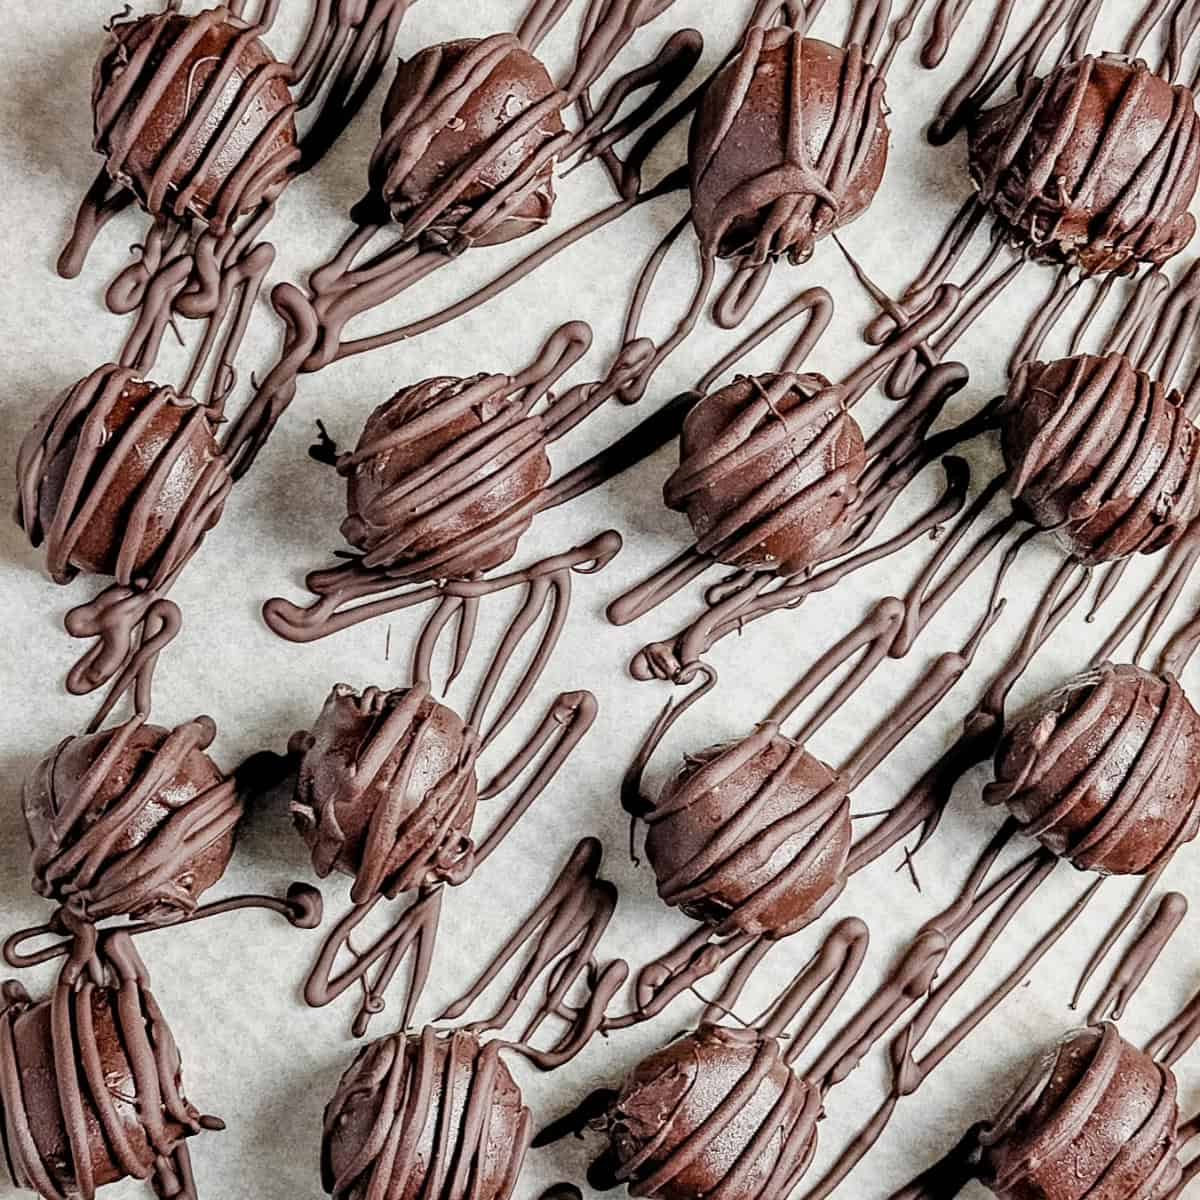
Dip each truffle in chocolate: Using a fork or toothpick, dip each chilled peanut butter ball into the melted chocolate, letting excess drip off. Return to the parchment-lined tray.
Chill and Serve: Refrigerate until the chocolate is fully set, then enjoy straight from the fridge or pack into containers for gifting.


Best Tips to Get the Perfect Chocolate Peanut Butter Truffle
Use the right peanut butter: If I only had to give you one tip, it would be this. Skip natural peanut butter that separates; a standard creamy peanut butter (like Jif or Skippy Brand) gives you the best texture for rolling and dipping.
Soften your vegan butter: Your butter should be soft but not melted so it blends smoothly with the peanut butter and powdered sugar without turning greasy.
Adjust the sweetness/texture if needed: If your mixture feels too soft or sticky to roll, add a bit more powdered sugar.
Let chocolate cool slightly: Use Warm (not piping hot) chocolate coats more evenly and won’t melt the peanut butter centers as quickly.
Don’t overheat the chocolate: Microwave the chocolate chips in short intervals and stir often to prevent scorching and clumping.
Serving Ideas for Chocolate Peanut Butter Truffles
You can eat these anyway you like, but here are my favorite ways to pair this chocolatey dessert.
- With coffee, espresso, or a glass of cold plant-based milk for a simple afternoon treat.
- As part of a holiday cookie tray or gift box alongside cookies, fudge, and other homemade candies.
- Crumbled over ice-cream or a pudding cup! YUM!
Frequently Asked Questions
It’s best not to; natural peanut butter that separates tends to make the mixture too loose and oily, so the balls can be harder to roll and may not hold their shape well when dipped
Yes, this recipe is naturally gluten-free as long as you use certified gluten-free brands for your peanut butter (Jif, Skippy and Justin's are good options) and vegan chocolate chips.
They’ll keep well in the fridge for about 5–7 days, and you can also freeze them for longer storage, as you would with other homemade truffles
Yes, place them in a single layer to freeze, then transfer to an airtight container or freezer bag. They can be frozen for up to about 2 months; let them sit at room temperature for several minutes before serving.
You can melt the chocolate chips on their own, or swap the coconut oil for a neutral vegetable oil or a small amount of vegan butter to thin the chocolate slightly.
Other Peanut Butter Desserts You May Enjoy


Recipe Card
Equipment
- 1 Hand Mixer or Sturdy Spoon
- 1 set of measuring cups and spoons
- 1 Parchment paper to line the baking sheet
- 1 Microwave-safe bowl
- 1 Fork or Toothpick to dip
- 1 air tight container for storage
Ingredients
- 1 cup creamy peanut butter like the Jif brand, not the natural kind
- ½ cup unsalted vegan butter softened (Earth Balance sticks are best)
- 2 cups powdered sugar
- 1 teaspoon vanilla extract
- A pinch of salt if your peanut butter is unsalted
- 2 cups vegan semi-sweet chocolate chips I used Enjoy Life brand
- 2 tablespoons coconut oil
Instructions
- Making the Peanut Butter Filling: In a large mixing bowl, combine the creamy peanut butter and softened vegan unsalted butter. If your peanut butter is salted, omit the pinch of salt.
- Stir in the powdered sugar and vanilla extract. Mix until the ingredients are well combined. The mixture should be smooth and slightly stiff.
- Line a baking sheet with parchment paper. Use your hands to roll the peanut butter mixture into 1-inch (2.5 cm) balls. Place the balls on the prepared baking sheet. You should get approximately 24 balls. If the mixture is too sticky, you can lightly grease your hands with a bit of butter or oil to help with shaping.
- Once all the balls are formed, place the baking sheet in the refrigerator for about 30 minutes to firm up.
- Coating the Peanut Butter Balls with Chocolate: In a microwave-safe bowl, combine the vegan semi-sweet chocolate chips and coconut oil. Microwave in 20-30 second intervals, stirring after each interval until the chocolate is smooth and fully melted.
- Using a fork or toothpicks, dip each peanut butter ball into the melted chocolate, ensuring it's evenly coated. Allow any excess chocolate to drip back into the bowl.
- Place the coated peanut butter balls back on the parchment-lined baking sheet. Let the chocolate-covered peanut butter balls cool and harden at room temperature for about 15-20 minutes. If you want to speed up the process, you can place them in the refrigerator for 10-15 minutes.
- Once the chocolate is completely set, you can store the Chocolate-Covered Peanut Butter Balls in an airtight container in the refrigerator. They're best served chilled.
Notes
- Use regular creamy peanut butter (not natural) so the mixture isn’t oily or too soft.
- If the dough is too sticky to roll, add a little more powdered sugar until it firms up.
- Chill or even briefly freeze the peanut butter balls before dipping to help them keep a nice round shape.
Nutrition
©Watch Learn Eat. All content and images are copyright protected, and are not to be used or republished without prior permission.