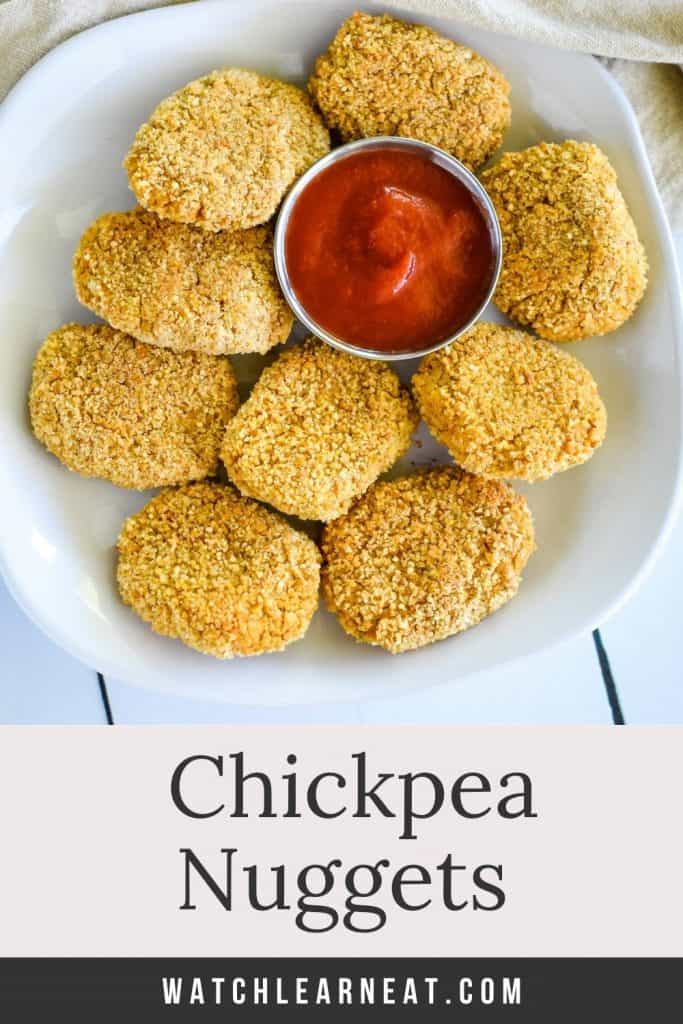
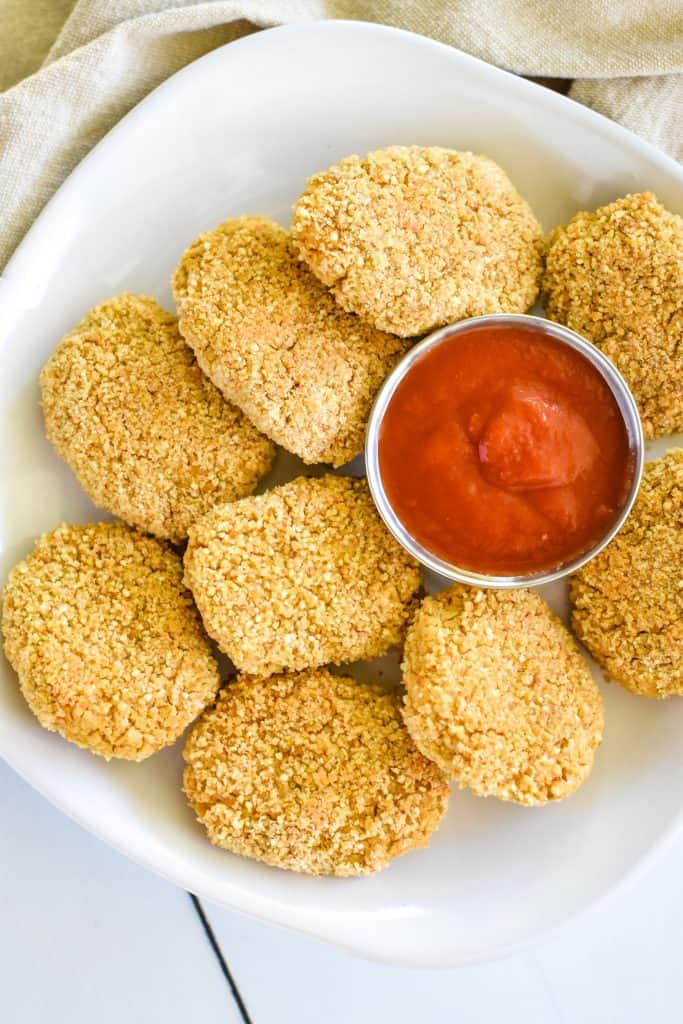
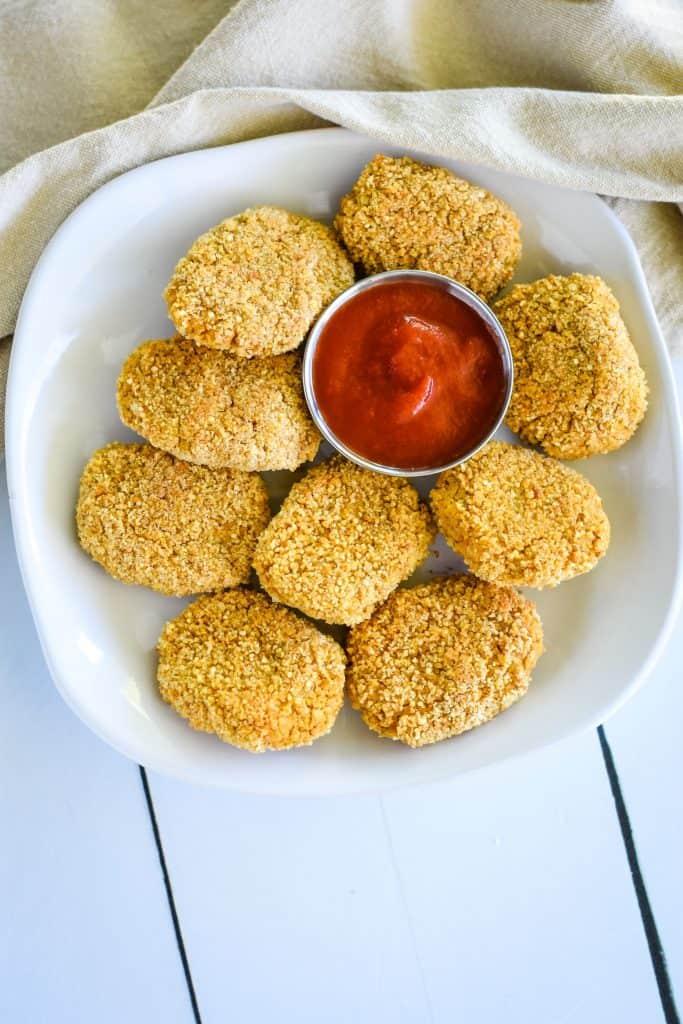
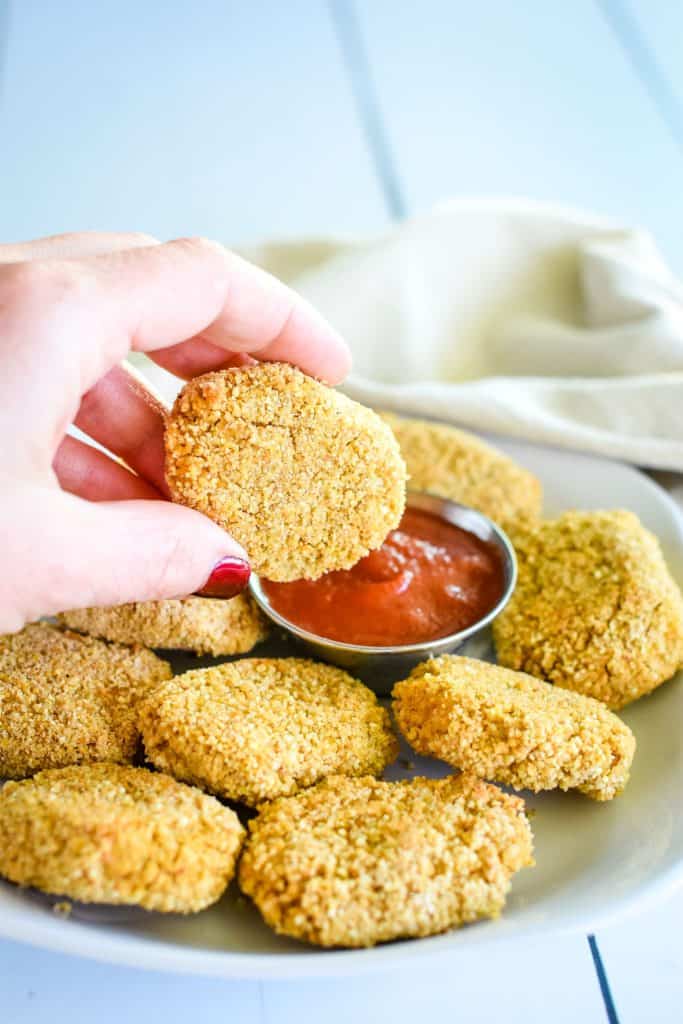
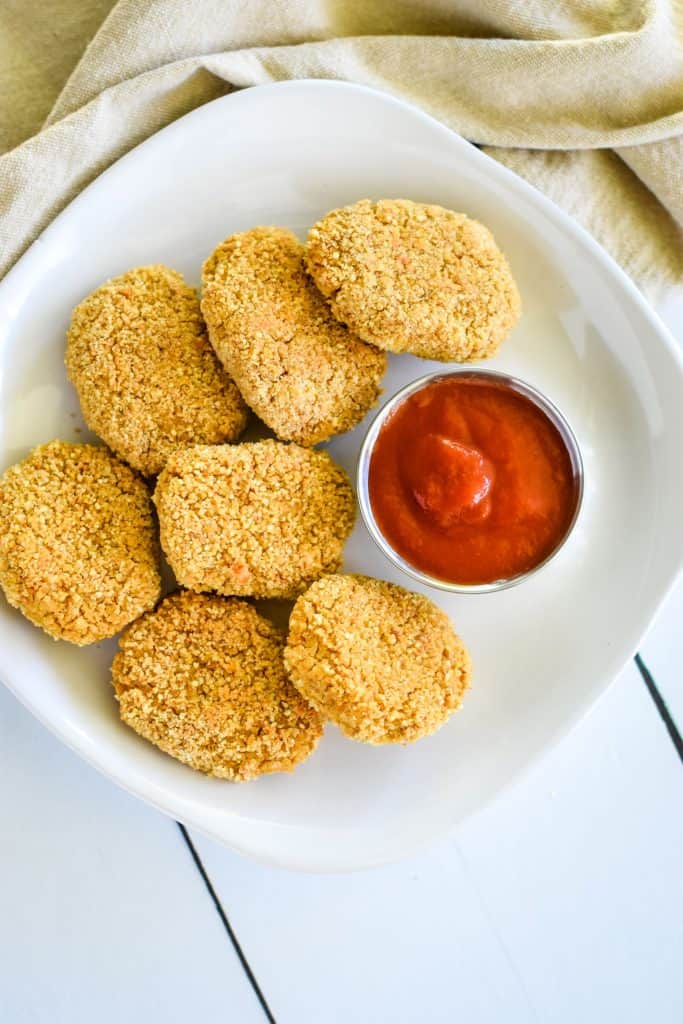
These chickpea nuggets are a tasty, healthy snack that even the pickiest eaters will love! They are packed with plant based protein and are perfectly golden on the outside and tender on the inside. Plus, they can be baked or air-fried for a healthier twist! Oil-free and gluten-free options included.
Trying to feed my kids healthy options is not for the weak. But i have started to notice that they like chickpeas - and these nuggets have become one of my go to when i need to whip up a quick snack.
Chickpeas are a great source of plant protein and fiber, and universally well liked - so i try to make a variety of dishes with them that everyone enjoys including chickpea curry, tacos, veggie burgers, and even vegan meatloaf for the holidays!
But by far, these nuggets are one of my chickpea favorites - they have 10 ingredients or less (if you are going oil-free) and are so easy to make! Plus they are totally delicious!
Table of contents
- Why you'll love these chickpea "chicken" nuggets
- Ingredients you'll need to make chickpea nuggets
- How to make chickpea nuggets
- Can I make chickpea nuggets in the air fryer?
- Cooking tips to get perfect nuggets
- What to serve with vegan "chicken" nuggets
- Best dips for vegan nuggets
- Equipment you'll need
- Storing and reheating
- Final Thoughts
Why you'll love these chickpea "chicken" nuggets
- Healthy Plant Based Alternative: These handheld gems are a delicious meatless alternative to traditional chicken nuggets. They are packed with plant-based protein and good-for-you ingredients.
- Taste Great: They are perfectly crispy on the outside and tender on the inside. Plus, they are kid-approved and great for picky eaters.
- Universally Liked: Because of chickpeas neutral flavor, chickpeas make a great base for pairing with other ingredients and serving as a plant-based meat alternative like in these Buffalo chickpea burgers, chickpea chocolate chip cookies, this chickpea noodle soup and more!
- Fast and Easy to make: This recipe requires 10 ingredients or less and come tougher in 10 minutes of prep! Plus you can bake, air fry, or pan fry to cater to different cooking preferences.
Ingredients you'll need to make chickpea nuggets
- Canned chickpeas
- Aquafaba (canned chickpea liquid)
- Oat Flour (use certified gluten-free if needed)
- Nutritional Yast
- Sea Salt
- Garlic Powder
- Paprika
- White Pepper
- Fine Bread Crumbs (use gluten-free if needed)
- Olive Oil Spray (omit for oil-free but note that the nuggets will be less crispy and less browned without using the oil)
See recipe card for quantities.
How to make chickpea nuggets
First, Preheat oven to 400° F and line a baking sheet with parchment paper.
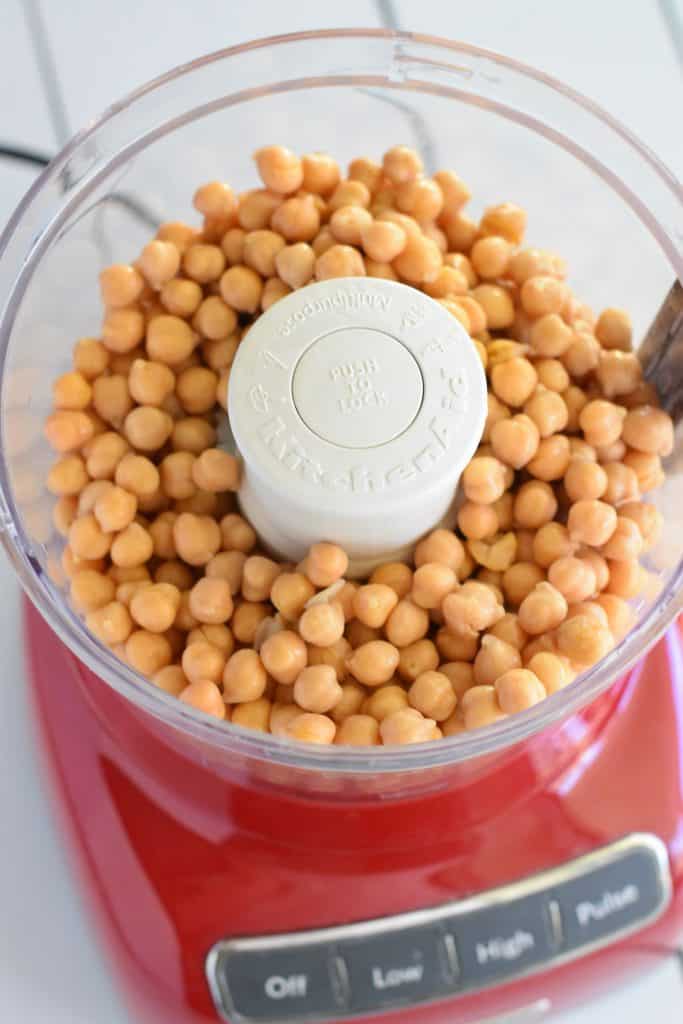
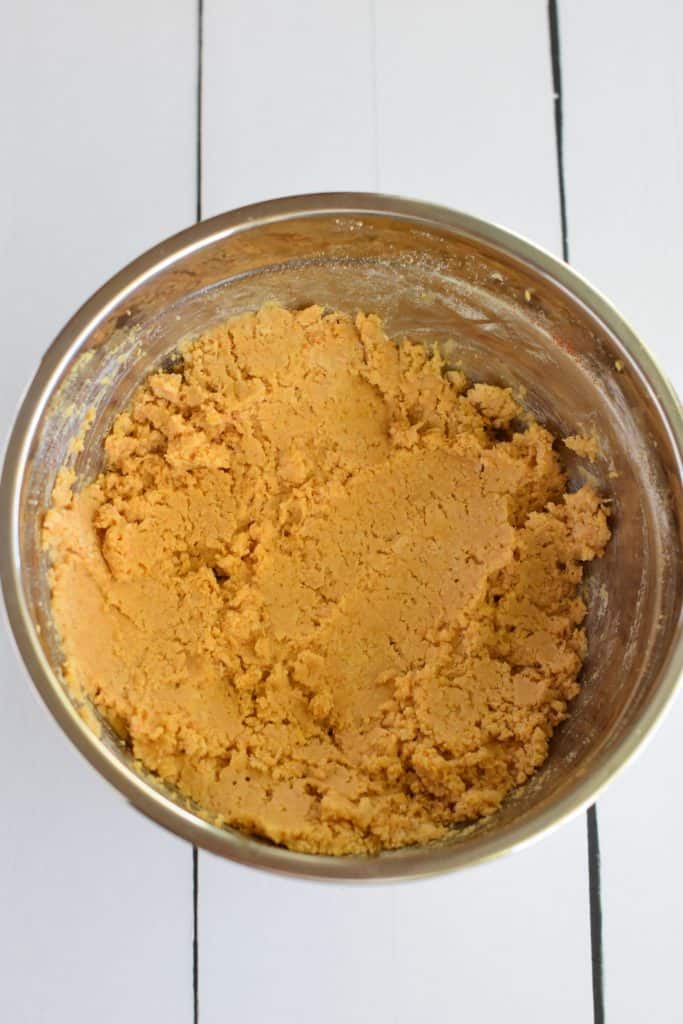
Add the chickpeas to the bowl of a food processor.
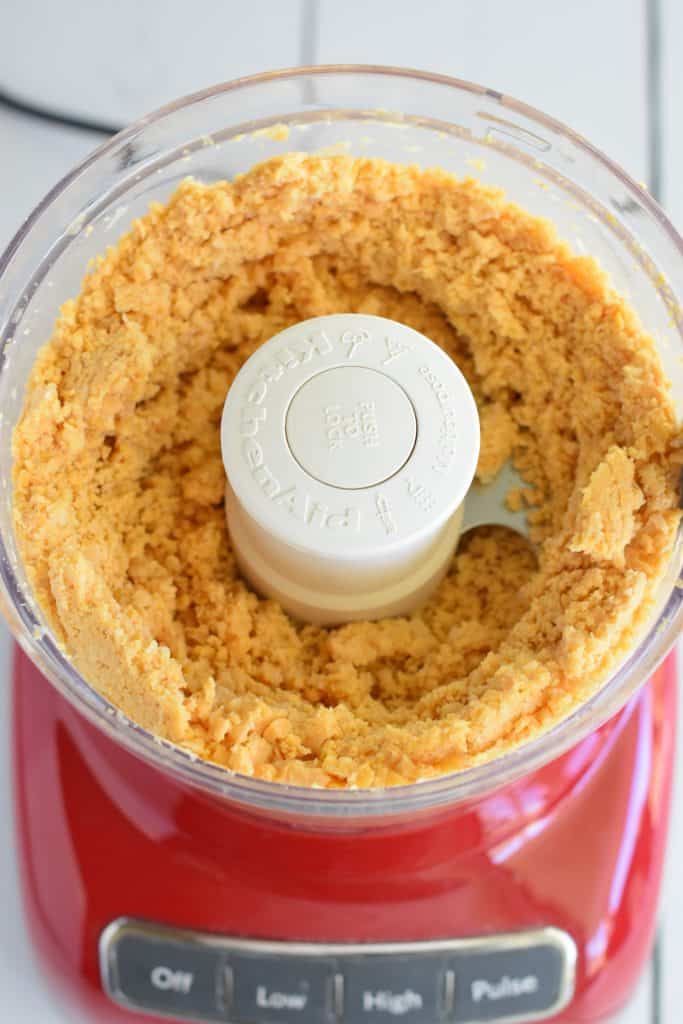
Pulse or process on low speed until the chickpeas are finely chopped and crumbly, but not over processed.
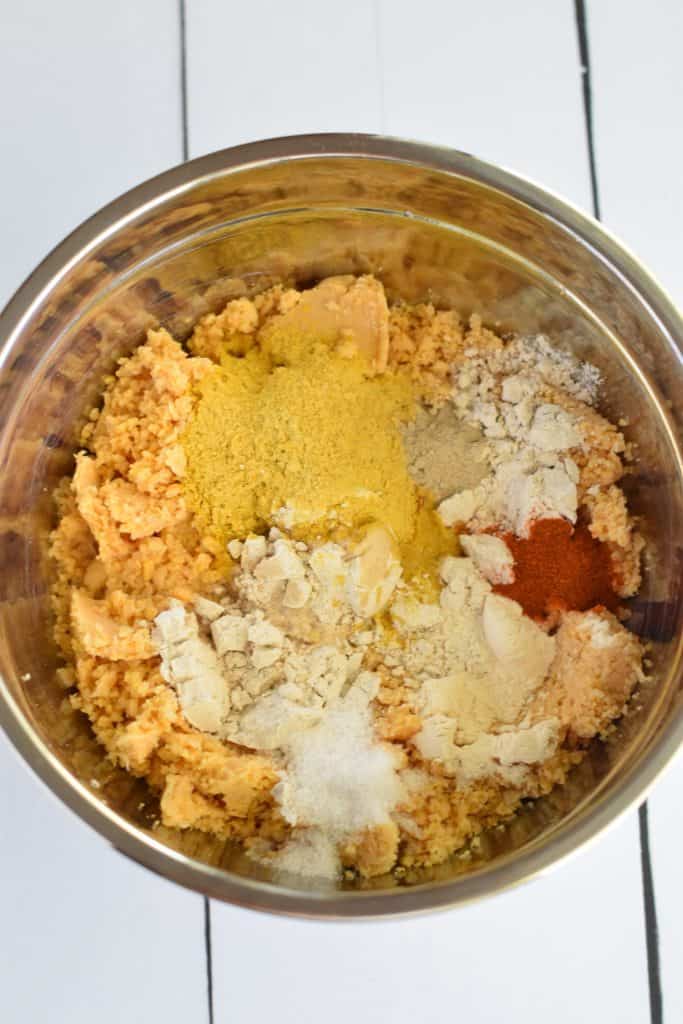
Then, transfer to a mixing bowl and add aquafaba, oat flour and seasonings.
Combine until ingredients are well incorporated.
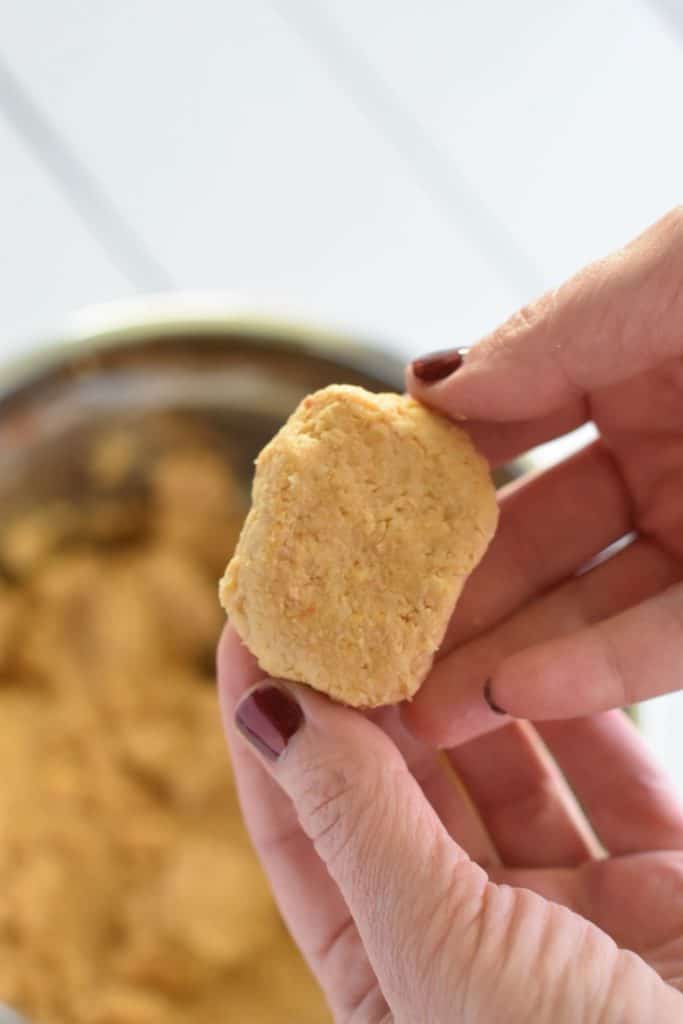
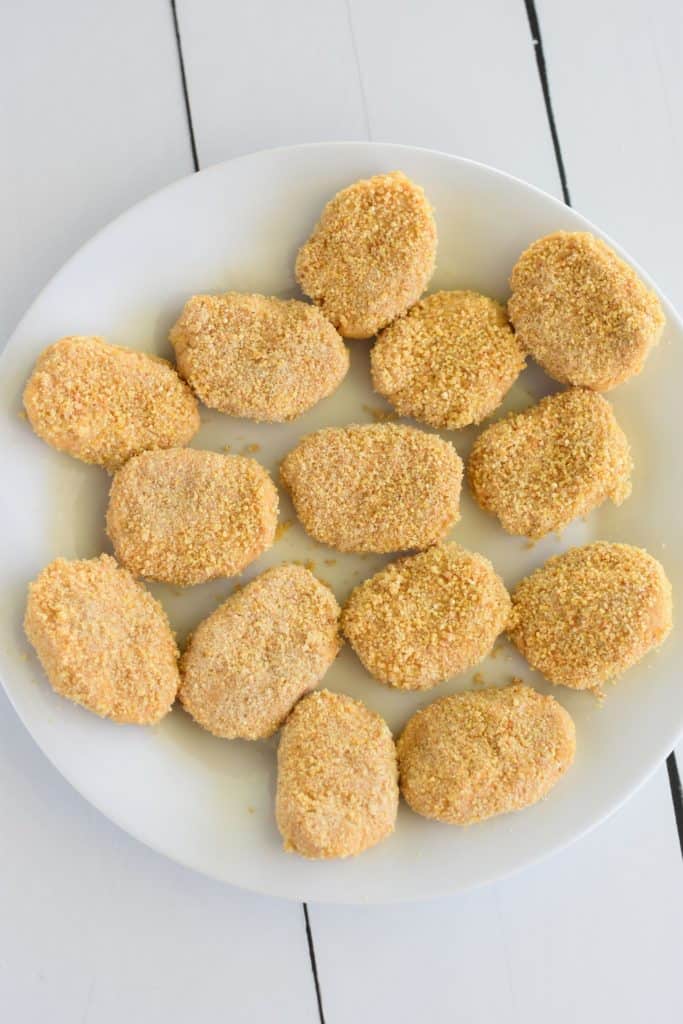
Use your hands to form the chickpea mixture into nugget shapes and place on a plate.
Set up a dipping station by adding aquafaba to a bowl and placing the bread crumbs on a plate next to it.
Dip each nugget into the aquafaba followed by the bread crumbs.
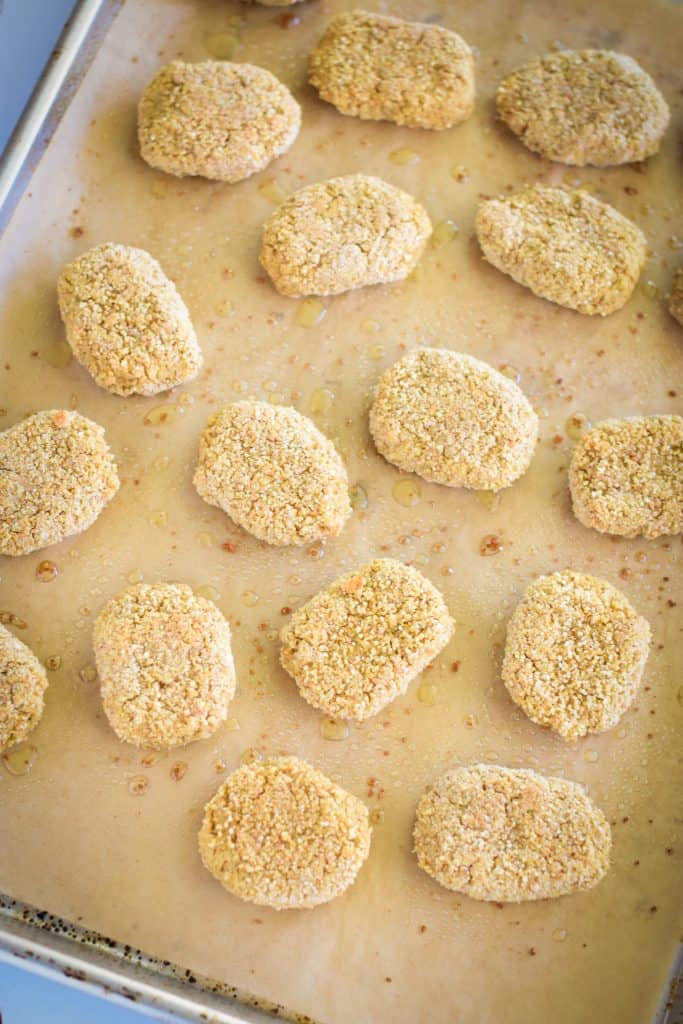
Lastly, place the nuggets in a single layer on the parchment-lined baking sheet.
Spray the tops of the nuggets lightly with the olive oil spray.
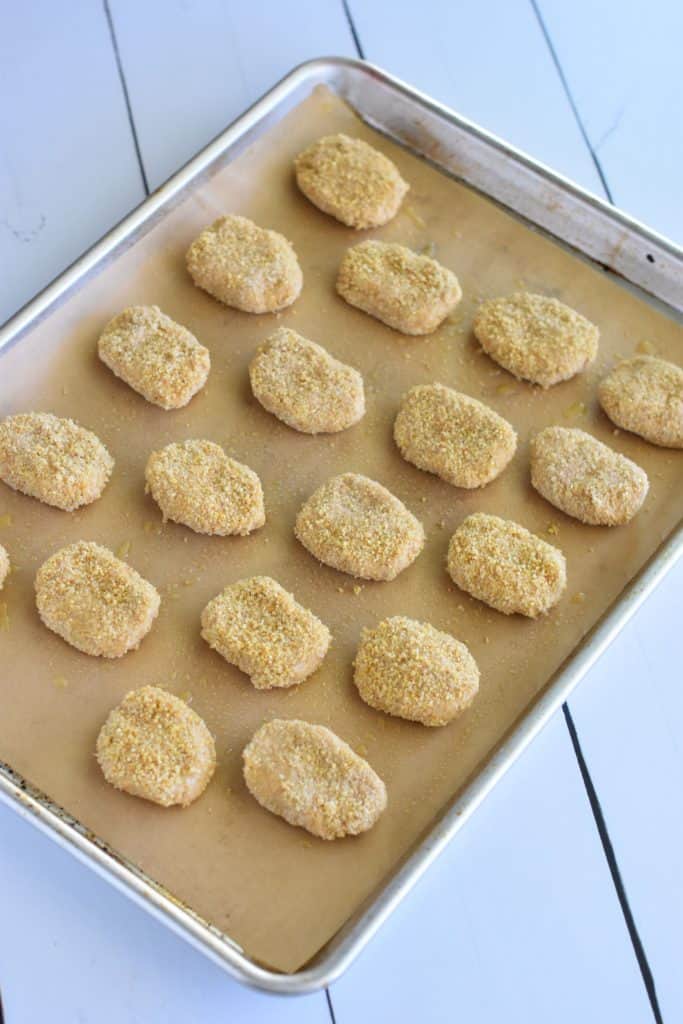
Omit this step for an oil-free option but note that they won't brown as well.
Bake the nuggets for 15 minutes and then flip and spray again with the olive oil spray.
Return to the oven and bake for another 15 minutes.
Can I make chickpea nuggets in the air fryer?
Yes! Just place the nuggets in the air fryer in a single layer and lightly spray the tops with the oil spray.
You may have to work in batches depending on the size of your air fryer.
Air fry at 390° F for about 20 minutes, flipping halfway and spraying again with the oil. Check out this recipe by healthy girl kitchen that has an oil free air fryer version of this recipe.

Cooking tips to get perfect nuggets
- If your nuggets are falling apart, try adding a bit more moisture to the mixture such as oil or water. You can also press them more firmly when shaping.
- Baking at a slightly higher temperature can help make the nuggets crispy without drying them out. Try baking at 400°F if they’re not crispy enough.
What to serve with vegan "chicken" nuggets
These nuggets are so versatile that you can either eat them as a snack or make them a meal with different sides. Here are some options to add on to make these a full meal:
- Tater Tots in the Air Fryer
- Sweet Potato Fries in the Air Fryer
- Waffle Fries in the Air Fryer
- Vegan Mac & Cheese
- Mashed Potatoes with Almond Milk and Vegan Cream Cheese
You can incorporate veggies to round out this meal. Add them on as a side dish or incorporate finely chopped vegetables like carrots, zucchini, or spinach into the mixture for added nutritional value:

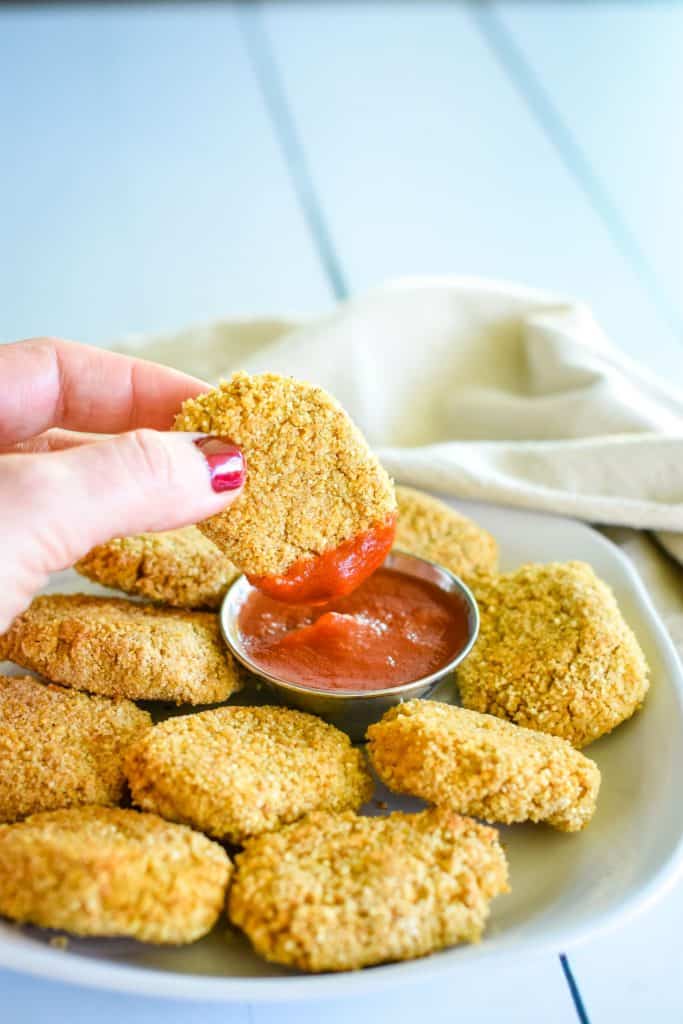
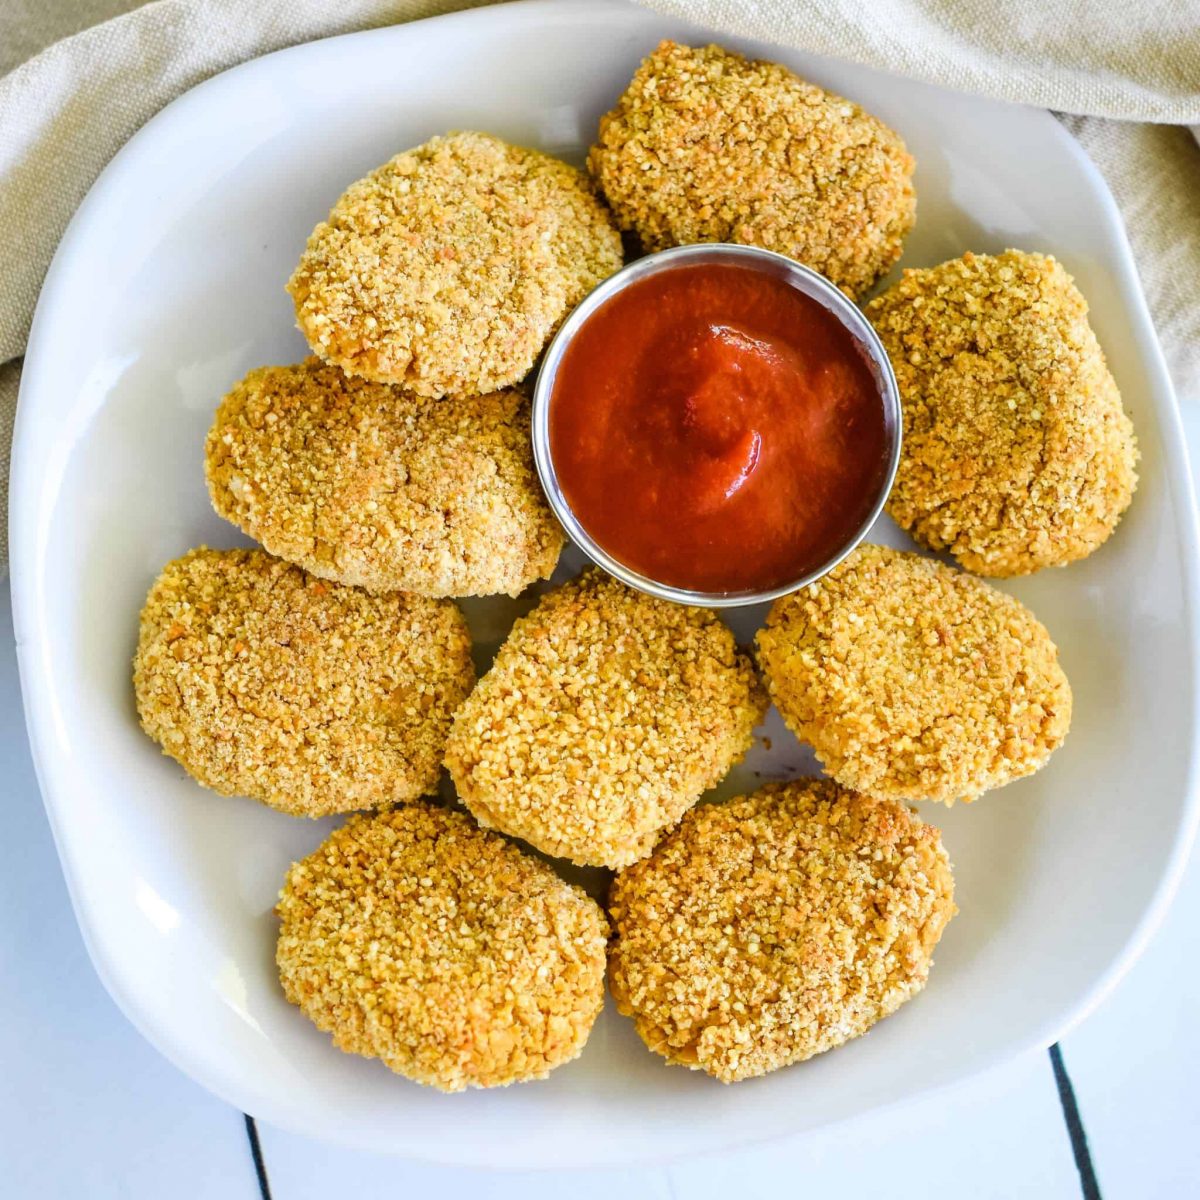
Best dips for vegan nuggets
These chickpea nuggets are perfect with a variety of dipping sauces. For instance, try them with ketchup, mustard, mayo, BBQ sauce, or even a spicy hot sauce for an extra kick! Here are some of our special sauces that are easy to make and go well with this dish:
- Vegan Honey Mustard Dip (or traditional honey mustard if you're not vegan)
- Maple Mustard Dip (vegetarian or vegan version)
- Vegan Ranch Dressing or Oil-Free Vegan Ranch Dip
Equipment you'll need
To make this recipe, you will need a food processor in order to get the chickpeas to the right consistency.
Storing and reheating
Store leftover nuggets in an airtight container in the refrigerator for up to 3 days.
They can also be frozen for up to 3 months.
To reheat, place them in the air fryer or oven at 350 degrees fahrenheit for 3-5 minutes until warmed throughout.
Final Thoughts
Whether you're looking for a quick snack or a fun addition to your meal, these chickpea nuggets are sure to be a hit. Try them out and let us know your feedback in the comments below!
More vegan chickpea recipes
- Chickpea and Potato Curry
- Chickpea Tacos
- Pasta e Ceci (Pasta and Chickpeas)
- Vegan Casserole with Chickpeas and Butternut Squash
Equipment
Ingredients
- 2 (15 oz.) cans no salt added chickpeas
- 10 tablespoons aquafaba, divided (canned chickpea liquid)
- ¼ cup oat flour (use certified GF if needed)
- 2 tablespoons nutritional yeast
- 1 teaspoon fine sea salt
- ½ teaspoon garlic powder
- ½ teaspoon onion powder
- ½ teaspoon paprika
- ¼ teaspoon white pepper
- ½ cup fine bread crumbs (use GF if needed)
- olive oil spray (*omit for oil-free)
Instructions
- Preheat oven to 400° F and line a baking sheet with parchment paper.
- Drain and rinse the chickpeas, reserving the liquid from the can (aquafaba).
- Add the chickpeas to the bowl of a food processor. Pulse or process on low speed until the chickpeas are finely chopped and crumbly, but not overprocessed.
- Transfer to a mixing bowl and add 6 tablespoons of the aquafaba and the next 7 ingredients. Combine until ingredients are well incorporated.
- Use your hands to form the chickpea mixture into nugget shapes and place on a plate. The mixture will yield approximately 18-20 nuggets depending on the size.
- Set up a dipping station by adding ¼ cup of the aquafaba to a bowl and placing the bread crumbs on a plate next to it.
- Dip each nugget into the aquafaba followed by the bread crumbs.
- Place the nuggets in a single layer on the parchment-lined baking sheet. Spray the tops of the nuggets lightly with the olive oil spray. You can omit this step for an oil-free option but note that they won't brown as well.
- Bake the nuggets for 15 minutes and then flip and spray again with the olive oil spray. Return to the oven and bake for another 15 minutes.
Video
Notes
Nutrition
©Watch Learn Eat. All content and images are copyright protected. Recipes and photos are not to be used or republished without prior permission. If you adapt this recipe, please re-write the recipe in your own words, and link back to this post for the original recipe.


Leila
Currently making these. I've used blended crackers that were a bit dull in place of breadcrumbs. I plan to freeze these. Can I reheat from frozen or do I need to defrost first? How long would you reheat in the air fryer from frozen if possible?
Sireesha
Hi There! I haven't tried to reheat them in the air fryer but would suggest to try it at 375 for 10-12 minutes in the air fryer. Let me know how they turn out in the air fryer!